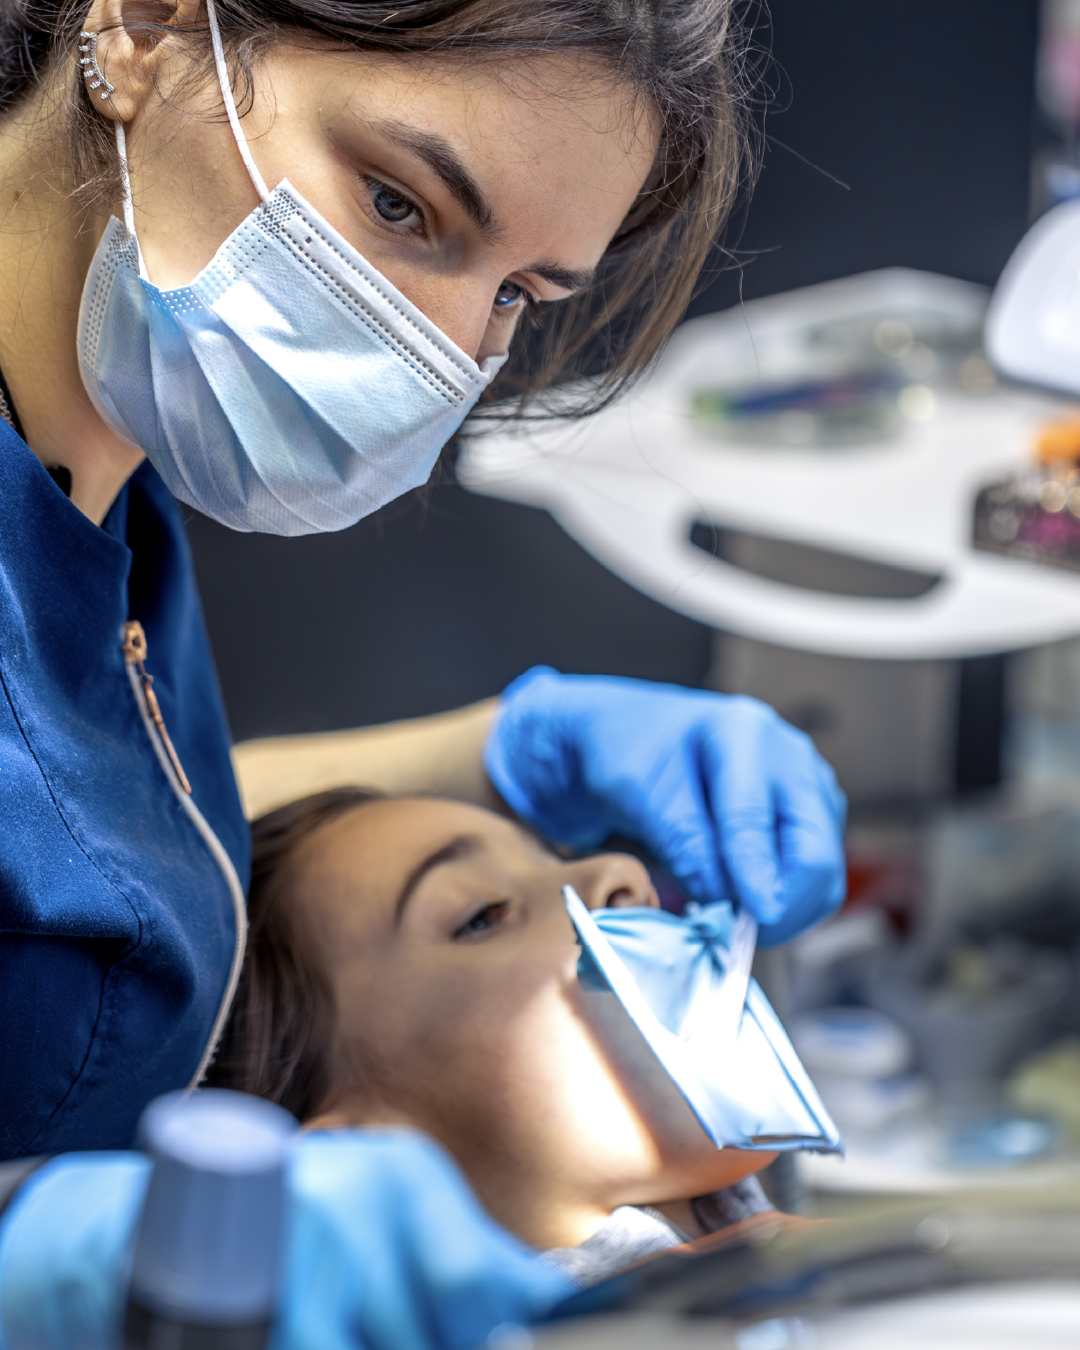


The restoration is finished. The composite has been placed, the anatomy is beginning to take shape, and the clinician checks that every detail integrates correctly with the tooth.
Then comes one of the shortest moments in the procedure and, at the same time, one of the most decisive: light-curing.
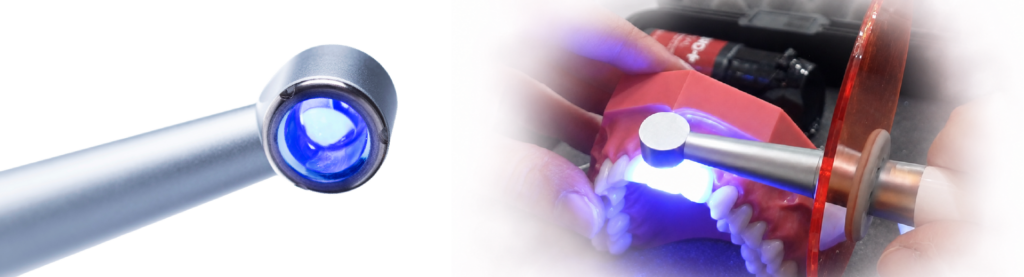
The curing light is brought closer, the cycle is activated and, for a few seconds, the light initiates a monomer transformation that cannot be fully seen with the naked eye. The resin changes from a moldable material into a restoration that will have to withstand chewing, temperature changes, moisture and the passage of time.
However, the fact that a resin appears hard does not necessarily mean that it has been correctly light-cured throughout its entire depth.
Light-curing of dental composite resins directly affects the strength, color stability, mechanical behavior and longevity of the restoration. For this reason, it should not be regarded as an automatic step or simply as a countdown controlled by the curing light.
To achieve a predictable result, three elements need to be combined: a suitable resin, a compatible light source and a controlled clinical technique.
Within Kiyomi’s restorative ecosystem, the KIRA curing light and Aster+ and Aster Flow+ resins have been designed to support the dentist throughout this process, from the initial adaptation of the material to the final light-curing cycle.
What happens when we light-cure a dental resin?
Composite resins contain photoinitiators that are capable of reacting to specific wavelengths.
When the light emitted by the curing unit reaches the material, these photoinitiators trigger a chemical reaction that links the monomers in the resin matrix. In this way, the composite progressively changes from a moldable state into a solid structure.
However, this transformation does not occur instantly or uniformly.
The light must pass through the mass of the material and reach the deepest areas of the increment. Along the way, some of the energy may be scattered, absorbed or lost. Color, opacity, thickness, composition and the distance of the curing light all influence the amount of energy that the resin actually receives.
For this reason, a surface that appears hardened may conceal insufficient polymerization at greater depths.
The goal is not simply to make the resin stop being soft. The real objective is to achieve the intended degree of conversion so that the material develops its mechanical and aesthetic properties.
Why is proper light-curing so important?
When a direct restoration is performed, much of the clinical effort is focused on bonding, shade selection, layering, anatomical shaping and polishing.
However, all of these steps depend on the resin receiving the necessary amount of energy.
Insufficient light-curing can affect:
- Composite hardness.
- Wear resistance.
- Color stability.
- Marginal integrity.
- Mechanical strength.
- Long-term material behavior.
- Biocompatibility of the restoration.
It may also increase the risk that certain deeper areas fail to reach the expected level of conversion, especially in posterior restorations, proximal boxes or cavities where the curing light cannot be positioned close to the material.
Therefore, light-curing is not simply the final action in a restoration. It is the process that consolidates all the work carried out beforehand.
How long should a resin be light-cured?
This is one of the most frequently asked questions in restorative dentistry, but there is no single answer.
The time required to light-cure a resin depends on the material used, the intensity of the curing light, the thickness of the increment, the shade of the composite, its opacity, the distance from the light source and the photoinitiator system.
As a general guideline, many conventional composite resins are placed in increments of up to 2 mm and light-cured for approximately 10 or 20 seconds using a suitable LED curing light that meets a specific light output and wavelength range.
However, this guideline cannot automatically be applied to every case.
An opaque mass, a dark shade, a deep restoration or a greater distance between the curing light and the resin may require longer exposure times. In certain situations, the cycle may need to be extended to 30 or 40 seconds.
The composite manufacturer’s instructions should always be the starting point.
Before beginning light-curing, it is advisable to check:
- The maximum recommended thickness for each increment.
- The exposure time indicated for the material.
- The irradiance of the selected mode.
- Compatibility between the curing light spectrum and the photoinitiator.
- The distance between the light tip and the resin.
- The shade and opacity of the composite.
- The condition and cleanliness of the light guide.
Using a high power output does not mean that the curing time can always be reduced. The energy must reach the entire restoration correctly, not just the surface. In addition, the material must be able to tolerate that power due to the polymerization shrinkage that occurs during the process.
The right question, therefore, is not only how many seconds a resin should be light-cured, but how much energy the material is actually receiving during that time.
Factors that can compromise light-curing
Increment thickness
Light loses intensity as it travels through the resin. Therefore, the greater the thickness, the more difficult it becomes to achieve uniform polymerization in deeper areas.
With conventional composites, the incremental thickness specified by the manufacturer should be respected. Thicknesses intended for bulk-fill materials should not be applied to a resin that has not been designed for that technique.
Color and opacity
Darker and more opaque shades make it more difficult for light to pass through the material. An opaque dentin shade and a translucent enamel shade may require different protocols, even if they belong to the same restorative system.
When working with less translucent materials, it may be necessary to reduce the thickness of the increment or increase the exposure time.
Distance
In a simple anterior restoration, bringing the curing light close to the composite may be easy. The situation changes when the material is located at the bottom of a proximal box, in a posterior molar or behind a cusp.
As the distance increases, the amount of energy reaching the restoration decreases. For this reason, the light tip should be positioned as close as clinically possible without touching or contaminating the material.
Angulation
The light should strike the surface perpendicularly. If the curing light is tilted, part of the energy is scattered and the resin receives less irradiance.
Keeping the curing light stable throughout the entire cycle may seem like a minor detail, but it can affect the result.
Beam size
When the diameter of the restoration is larger than the illuminated area, a single exposure may not be enough.
In such cases, several partially overlapping exposures should be performed so that the entire surface receives a similar amount of energy.
Curing light cleanliness
A small layer of adhesive or composite on the lens can significantly reduce light output.
The light guide should be inspected and cleaned periodically. It is also advisable to monitor the condition of the battery and check that the device maintains consistent performance.
KIRA: when the curing light stops being just an accessory
For a long time, the curing light has been perceived as a secondary instrument. It was used at the end of each increment, almost automatically, without receiving the same attention as the adhesive or the composite.
But it only takes a complex posterior restoration to understand that not all curing lights perform in the same way.
The patient has limited mouth opening. The proximal box is deep. The matrix makes access difficult, and the light tip must be positioned precisely to get close to the material. At that point, the design of the curing light stops being an aesthetic consideration and becomes a clinical necessity.
KIRA was created specifically to support dentists in these situations.
Its adjustable head makes it possible to find the correct angle without forcing the clinician into uncomfortable positions. Its lightweight design helps keep the curing light stable throughout the cycle, avoiding small movements that could redirect the beam.
But KIRA’s real value becomes clear when the clinical situation changes.
A thin layer of flowable resin at the bottom of a cavity does not require the same approach as an increment of composite in a posterior restoration. Likewise, starting polymerization progressively is not the same as working at a higher intensity at a specific point in the procedure.
That is why KIRA offers different operating modes. The clinician can adapt the light output to the material and procedure instead of always applying the same routine cycle.
Its 385 to 515 nm spectrum, generated by four LEDs, broadens compatibility with different photoinitiators used in restorative dentistry. This broad spectrum is particularly important in a clinic where composites, adhesives, cements and other light-curable materials are used side by side.
KIRA also features a detection mode that makes use of the fluorescence of certain materials. As a result, the curing light is no longer involved only during polymerization and can also assist during other stages of the procedure.
More than simply a light source, KIRA is the point at which the clinical protocol is transformed into a solid restoration.
Aster+: building a restoration one increment at a time
A composite restoration often begins with a simple decision: how to restore a tooth to a shape that looks natural while also responding correctly to functional forces.
In a posterior Class II restoration, for example, the dentist is not simply filling a cavity. They are reconstructing a contact point, a marginal ridge, occlusal anatomy and a surface that must integrate with the rest of the dentition.
This is where Aster+ comes into play.
Its consistency allows the material to be handled, displaced and shaped without immediately losing its form. The clinician can build the restoration incrementally, control volumes and define the anatomy before applying the light.
In the anterior region, the challenge is different. The restoration needs to visually disappear. Each layer helps restore depth, brightness and a natural appearance to the tooth.
Aster+ can be used for both anterior and posterior restorations, supporting the dentist from the reconstruction of volume through to the final anatomical details.
Its high filler content contributes to the required strength, while its polishability helps produce a smooth and aesthetic surface.
However, the behavior of the resin does not end once it has been shaped.
Each increment of Aster+ needs to receive the correct amount of energy to consolidate the form created by the clinician. The quality of the result depends both on the properties of the composite and on how it is light-cured.
When Aster+ and KIRA are used as part of a controlled protocol, placement and light-curing stop being separate steps. Each layer is adapted, shaped and stabilized before moving on to the next, progressively building the restoration.
Aster Flow+: reaching areas where a conventional resin cannot adapt in the same way
There are areas of a preparation where control is not about shaping the material, but about ensuring that it adapts properly.
The floor of a cavity, a small irregularity, a cervical lesion or a deep fissure may require a resin that can flow without completely losing control.
Aster Flow+ has been designed for these situations.
Its flowable consistency allows it to follow the geometry of the preparation and reach areas where a conventional composite may require greater manipulation.
The clinician brings the syringe tip closer, dispenses a small amount and observes how the material adapts. The aim is not to fill the cavity quickly, but to create a controlled layer that follows the dental surface.
In a posterior restoration, Aster Flow+ can act as a base before continuing with Aster+. In a cervical lesion, its adaptability makes placement easier in an area where access and retention may be more demanding. In pits and fissures, its flowability allows it to reach narrow areas.
Precision, however, does not depend solely on viscosity.
A layer of flowable resin must also be correctly light-cured. The curing light should be positioned close, perpendicular and stable so that the material receives the required amount of energy across its entire surface.
This is where the relationship between Aster Flow+ and KIRA becomes important once again: a resin designed to adapt and a curing light that allows the mode and position of the light to be controlled.
One procedure, three connected stages
Imagine a posterior restoration.
After the adhesive protocol, the dentist places a thin layer of Aster Flow+ to improve adaptation at the bottom of the cavity. It is distributed in a controlled manner, and KIRA is brought closer to begin light-curing.
Once this first layer has been stabilized, reconstruction begins with Aster+. Each increment restores part of the lost volume. First the proximal wall, then the internal anatomy and finally the occlusal surface.
Between one layer and the next, KIRA comes into play again.
The light consolidates each stage before moving on to the next. It is not used only at the end of the procedure but accompanies the entire construction of the restoration.
Aster Flow+ facilitates adaptation. Aster+ makes it possible to reconstruct the shape. KIRA transforms each increment into a stable structure.
This creates an integrated restorative protocol in which the products do not function as isolated elements, but as parts of the same clinical sequence.
Protocol for improving the light-curing of composite resins
1. Read the composite instructions
Check the maximum thickness, required irradiance and recommended exposure time.
2. Select the appropriate mode
Do not automatically use the maximum intensity every time. Adapt the cycle to the material and the clinical situation.
3. Control the thickness
Work with regular increments and respect the limits established for the resin.
4. Bring the light tip closer
Position the curing light as close as possible and prevent matrices, cusps or other elements from blocking the beam.
5. Maintain a perpendicular position
Direct the light straight onto the surface and keep your hand stable throughout the entire cycle.
6. Cover the entire restoration
When the beam does not cover the whole surface, perform several overlapping exposures.
7. Check the light guide
Make sure there are no remnants of adhesive, composite or other materials attached to it.
8. Protect your eyesight
Use a suitable protective shield or filter and avoid looking directly at the light source.
Common errors during light-curing
One of the most common mistakes is activating the curing light before it has been positioned correctly. During that first second, the light guide may still be too far away or tilted, causing some of the energy to be lost.
It is also common to move the light tip during exposure, particularly in posterior areas.
Another mistake is relying solely on the device’s maximum power output. A powerful curing light cannot compensate for excessive distance, a dirty lens or a beam that does not cover the entire restoration.
Finally, the same curing time should not be used for every composite. Each material has a different composition, opacity and photoinitiator system.
How many seconds should a composite be light-cured?
Many conventional composites require between 10 and 20 seconds per increment with a suitable LED curing light. However, the curing time may increase depending on thickness, opacity, distance and light intensity. The manufacturer's instructions should always be followed.
What happens if a resin is not properly light-cured?
It may have lower hardness, reduced wear resistance and poorer colour stability. Deeper areas may also remain with an insufficient degree of conversion.
Is a more powerful curing light always better?
Not necessarily. The wavelength spectrum, beam homogeneity, tip diameter, stability and ability to access the restoration correctly should also be taken into account.
Why does the composite remain sticky after light curing?
The surface may have an oxygen-inhibited layer. However, if the material remains soft at depth, the thickness, curing time, distance and performance of the curing light should be checked.
What type of curing light is used for dental resins?
A curing light with a wavelength spectrum compatible with the resin's photoinitiators should be used. KIRA operates within a range of 385 to 515 nm and features different modes to adapt to different restorative procedures.
Light-curing is also part of the restoration
The restoration does not end when the dentist achieves the desired anatomy. It ends when each layer has received the energy required to develop its properties correctly.
The light-curing of dental composite resins should be carried out with the same level of attention as bonding, layering or polishing.
A good technique requires control of curing time, distance, angulation, thickness and compatibility between the curing light and the material.
In this process, KIRA, Aster+ and Aster Flow+ form a logical sequence: adapt, reconstruct and light-cure.
Three different stages within the same restoration with one shared objective: helping the dentist work in a simpler, more controlled and predictable way.
Discover the KIRA curing light and Kiyomi’s Aster+ and Aster Flow+ resins. Check their availability at IPG Dental and request advice on choosing the most suitable restorative materials for your dental practice.